Perfecting your wheel-end inspections: Everything you need to know
Key Highlights
- Regular inspections, including pre- and post-trip checks, are vital for early detection of issues like seal leaks, bearing wear, and lubricant contamination.
- Failure at the inspection stage could mean a deadly wheel-off later.
- Follow manufacturer guidelines and the R.I.S.T. method for effective wheel-end inspections
- Inspect spindle threads, bearings, and fasteners for damage, corrosion, or wear, replacing any compromised parts to prevent wheel separation.
- Proper lubrication, seal integrity, and component alignment are essential for safe operation and to extend the lifespan of wheel-end components.
The wheel-end is one of the most component-dense parts of a truck, requiring careful maintenance from hub to nuts. And because you can’t change a tire or service brakes without removing it, it’s also one of the most handled areas.
Neglect can be measured at best in dollars and at worst—innocent lives. Under- or poorly-maintained wheel-ends commonly lead to irregular tire wear and, when drivers and technicians fail to see the proper signs, may eventually spiral into a wheel-off event. It’s dangerous enough when this happens with a pickup tire, let alone a trailer with a dual-tire assembly.
Billy Turner, a former fleet owner in Oklahoma who invented the TetherTech Wheel Safety system to stop wheel separations by holding the wheel-ends together via a steel cable through the axle, knows all too well the damage they can cause. He’s had the grim task of reviewing dozens of tragic accidents where rubber and steel collide, and seen what wheel-offs can do.
“A separated wheel opens up cars like a can opener,” he lamented.
And the cause may come down to missing very minor details when re-attaching a wheel-end assembly. Turner noted “you can forget one 50-cent washer, and have the whole thing come off and kill somebody.”
It’s hard to pin down how many wheel-offs happen a year, though a 33-year-old NTSB study pegged it as three a day. And that was only what was reported.
That’s the worst-case consequence when technicians cut corners or receive poor training, and there are no quality checks in place. Subpar hub maintenance doesn’t always result in losing a wheel, but the costs do add up. Irregular tire wear, for instance, impedes rolling resistance and therefore fuel efficiency. On one truck, that’s not so bad, but what if you have 1,000?
The wheel-end needs to be a point of emphasis, and everyone involved in the operation and maintenance of commercial vehicles and trailers should be up to speed. With that in mind, here’s a primer on the best practices and parts to put an end to wheel-end headaches.
First line of defense: inspections
Most issues should be caught early through driver pre- and post-trip inspections. More thorough inspections should take place based on manufacturer guidelines, usually every 50,000 to 100,000 miles.
Turner noted certain indications of damage may mean the equipment will need to be taken out of service and immediately repaired, but you have to know what to look for.
Experts outlined several inspection areas to focus on:
- Seal integrity: look for leaks and damage
- Bearing condition : check for noise, play, or discoloration
- Lubricant quality: inspect for contamination or breakdown
- Hub cap and vent plug condition
Bob Fogal, president and CEO of IMI Products, stressed the importance of cleanliness for properly identifying signs of wear or damage. Technicians may not even be able to see indications of potential issues when a wheel is covered in grease, grime, and brake dust.
“It’s difficult to actually see the surface of the wheel unless you clean it,” he said. “When you simply wash a wheel on a more regular basis, like when your tires are being changed, you would have an opportunity to uncover some of those safety issues. They’re just concealed otherwise.”
Recognizing a seal leak, though, isn’t so cut and dry.
Brian Beathard, co-founder and principal at RevHD, a maker of wheel seals, noted that most seal manufacturers will say that a moist wheel seal is fine. In fact, “some seal engineers will tell you they prefer to see a moist or damp seal as opposed to a bone-dry seal,” he explained.
“However, if that lubricant is accumulating to where it appears to be dripping soon or it’s already dripping, then that is a leaky seal, and that needs to be changed.”
Truly leaking seals can be disastrous if not caught, so it’s critical to know the signs.
“If you go across the DOT scale and they climb up your trailer and see any oil running down your wheel seal, you’re not moving until a service vehicle comes out and repairs that wheel seal, because that’s how critical that is,” Turner cautioned. “If that thing runs out of oil, you’re only a matter of minutes away from it being catastrophic and the bearing completely eating itself up, and the tires and wheels coming off.”
Another area to visually inspect is the level, color, and consistency of the lubricant itself, added Jason Galbraith, national service manager at ConMet.
“If you see signs of contamination like water, metal flakes, or discoloration, or if a seal leak is present, that’s when the wheel-end needs to come apart for service,” he continued. Metal flakes may indicate bearing damage or early failure, and can be found by running a magnet through the hubcap fill plug. A milky appearance may mean oil has been contaminated by water.
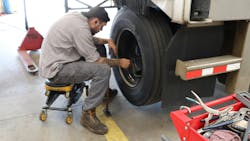
For more comprehensive inspections, Greg Dvorchak, engineering supervisor, application engineering, wheel-ends and braking systems, Hendrickson, recommends checking the hubcap for cracking or damage monthly. Inspect the wheel-end itself every three months, “lifting the trailer and spinning the wheel-end to look for quiet and smooth rotation,” he said, adding to pay attention to wheel-end play, which can only be done when the wheels are not installed. Galbraith agreed, especially in the case of manual-adjust systems.
Completing the actual inspection
As always with vehicle inspections and repair, consult the wheel-end components' service manuals, particularly with inspection intervals.
And when in doubt, follow the R.I.S.T. Method:
- Remove debris from mating surfaces
- Inspect components for damage
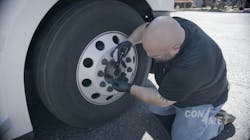
- Snug the lug nuts in a star pattern
- Torque all lug nuts to specification
But overall, here is the basic process, as determined by Fleet Maintenance and industry best practices:
- Park the vehicle, block the wheels, and raise the axle so the tires clear the ground. Then place your jack stands.
- If spring brake chambers are supporting the axle, follow the manufacturer’s procedures to compress and lock the springs before servicing.
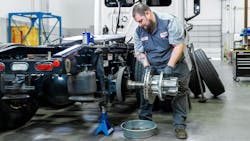
- Once you provide hub support, remove the spindle nut and outer bearing (and spacer when present in PreSet systems). Then gently slide the hub off the spindle.
- Inspect the spindle and spindle threads. Look for damage including:
- Nicks and punch/chisel marks
- Discoloration
- Weld bead damage (caused by poor repair or defect)
- Corrosion pits
- Fretting corrosion, which is caused by metal-on-metal friction and allows oxidation (appearing as rust-colored powder)
- Spalling, or pits and divots on bearings that get worse over time caused by impacts, contaminants, and poor lubrication
- For any minor thread issues, you can use a pitch file or die nut to restore them.
- Inspect fasteners, lock nuts, bearing adjustment nuts, and washers.
- Check for deformation or chisel marks (signs of possible improper installation or roadside repair).
- Remove and inspect bearings, looking for similar damage you checked for on spindle, such as pitting and corrosion. Swap damaged bearings with approved replacement
- Remove and replace the seal. Do not reuse!
- Take a moment to examine the lubricant, looking for presence of water, metal flakes, and milky discolored appearance.
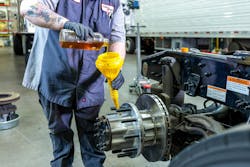
- Make sure to clean the hub and spindle, then re-lubricate. Also clean the hub and seal bores, removing any burrs and old sealant. Lubricate these as well with the same type as spindle (do not mix grease or oil types).
- Carefully reinstall the hub onto the spindle, making sure not to damage the seal.
- Install the outer bearing and adjusting nut. Refer to the manufacturer or TMC RP 618B for proper end play adjustment.
- Reinstall the hubcap and vents. Ensure the window is clear to check lube level. The center/side fill plugs should be pliable, and the vent holes are unobstructed. The flange should also be flat.
- Check that the hub is not cracked or damaged and bearing cups are not loose. This would demand a hub replacement.
- Inspect the hub body thoroughly for cracks, broken fasteners, or other damage. If bearing cups are loose, replace the hub immediately.
About the Author

Lucas Roberto
Lucas Roberto is an Associate Editor for Fleet Maintenance magazine. He has written and produced multimedia content over the past few years and is a newcomer to the commercial vehicle industry. He holds a bachelor's in media production and a master's in communication from High Point University in North Carolina.


