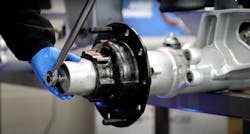
How to deal with stubborn wheel seals and bearing failures in seven steps
Wheel-end failures don’t just lead to costly downtime—they can also create serious safety risks. At STEMCO, our main goal is to provide technicians with best practices that will help prevent premature wear, reduce the risk of failure, and ensure smooth operation for your fleet vehicles. When dealing with stubborn or failing wheel seals and bearings, we recommend that technicians reference TMC Recommended Practice (RP) 622B, published by the Technology & Maintenance Council of the American Trucking Associations (ATA).
This RP, "Wheel Seal and Bearing Removal, Installation, and Maintenance Guidelines" provides a proven, standardized approach to wheel-end service. When followed closely, it reduces the likelihood of seal failure, bearing damage, and premature hub rebuilds. As always, we recommend that technicians refer to original equipment manufacturer recommendations on lube intervals and maintenance procedures.
Step 1: Wheel-end inspection
Catching early signs of trouble can prevent further issues down the road. If you start replacing parts without understanding the cause of the failure, you might end up repeating the same mistake. Proper inspection helps you isolate problems like over-lubrication, misalignment, or contamination before they escalate.
Before removing anything, do a full visual and physical inspection:
- Check for signs of lubricant leakage.
- Spin the wheel assembly and listen for grinding or humming.
- Feel for endplay or rough rotation.
- Inspect seal and bearing surfaces for scoring, discoloration, or pitting.
- Confirm hub material—aluminum hubs are more prone to bore distortion and may require a closer look.
*Contaminated lubricant or discolored bearing surfaces are red flags—don’t reuse them.
Step 2: Disassembly
Contaminants significantly reduce bearing life. By maintaining cleanliness during disassembly, you’ll prevent debris from entering new seals or bearings, which can cause premature failure. Plus, inspecting drained lubricant gives clues about any internal wear or water ingress.
When removing the hub:
- Use proper tools to avoid damage.
- Drain lubricant into a clean pan and inspect for metal shavings or water.
- Clean all components with an approved solvent—no shortcuts.
- Check bearing cup fitment—if a cup spun or was loose, replace the hub or consult with the manufacturer.
*Mark bearing positions if reusing components to ensure they return to the original orientation.
Step 3: Bearing inspection and replacement
Bearings operate under extreme pressure and heat. Even minor imperfections can compromise load handling and lubrication flow. Replacing a damaged cone but keeping the cup can create uneven wear and shorten service life dramatically.
Inspect inner and outer bearings carefully:
- Look for pitting, scoring, or discoloration.
- Replace both bearing cups and cones if any damage is found.
- Use a micrometer to verify journal and bore dimensions.
*Use a bearing puller and press—avoid hammering, which can damage the parts and lead to failure.
Step 4: Hub bore and spindle prep
It’s important not to rush through or skip hub and spindle prep, as these surfaces determine how well your new parts will perform. A worn spindle or distorted hub bore can also lead to immediate seal leaks or bearing misalignment. Taking a few extra minutes here ensures proper fit, consistent torque retention, and reliable long-term performance.
- Clean the hub bore thoroughly; remove corrosion or debris without removing material.
- Check that the bearing cups are fully seated—no gaps or rocking.
- Inspect the seal bore for nicks or distortion, measure if there’s concern about fit, especially on aluminum hubs.
- Clean and inspect the spindle for scoring or wear at the bearing journals and seal journal.
- If the seal journal shows wear, install a spindle repair sleeve or follow manufacturer recommendations.
*On aluminum hubs, measure the bore for roundness—distortion can lead to poor cup fit and premature failure.
Step 5: Seal installation
Improper seal installation is one of the top causes of lubricant leaks. A cocked or damaged seal can quickly lead to contamination, resulting in bearing failure and costly downtime. Using the proper tools ensures that seals sit flush and perform reliably.
- Choose a high-quality seal compatible for your lubricant and hub type.
- Use a proper seal driver tool—not improvised items like pipes or sockets.
- Press evenly until fully seated against the hub shoulder.
*Never lubricate the outer diameter of the seal—this can cause it to spin in the hub and fail prematurely.
Step 6: Reassembly
Too much endplay can lead to instability and heat buildup. Too little can crush the bearings. Achieving the right preload ensures optimal contact between rolling elements, supporting both safety and long-term performance.
- Coat bearings with a high-viscosity gear oil or specified grease.
- Adjust bearing endplay using a dial indicator. TMC recommends a target of 0.001"–0.005".
- Follow the proper torque-and-back-off sequence to preload the bearings correctly.
*Over-tightening is just as dangerous as leaving it too loose—use a torque wrench and follow the multi-step preload method outlined in RP 622B.
Step 7: Final checks
Final inspections catch what human error might miss. Ensuring smooth rotation confirms proper bearing alignment and preload. Painting stripes or marking fasteners can serve as a quick visual indicator for future inspections, helping fleets catch problems before they turn into failures.
- Spin the wheel hub—listen and feel for smooth rotation.
- Check endplay again after final torqueing.
- Apply torque stripe paint to fasteners as a visual check for loosening.
*Log the repair in your maintenance system with component serial numbers and lubrication used for later reference or follow up.
A safer way to service wheel ends
Following proven, trusted guidance like TMC’s RP 622B ensures that technicians can service wheel seals and bearings with confidence. With the right tools, procedures, and attention to detail, you’ll stop failures before they start—keeping drivers safe and downtime to a minimum.
For more insights like these, head on over to STEMCO’s Roadway Resources, your hub for time-tested wheel end wisdom.
