Why proactive u-joint maintenance?
Most rear-wheel drive trucks and four-wheel drive trucks integrate u-joints as part of the driveshaft assembly. These components handle the misalignment between the transmission and the rear axle, while transferring power to move the vehicle.
Proactive u-joint maintenance, repair and replacement are critical for improving the performance and safety of your fleet. Taking a reactive approach and waiting until u-joints break and fail completely can lead to the all-too-familiar scene of the immobile truck by the side of the road with the unattached driveshaft lying on the ground beneath the vehicle.
This scenario is both dangerous and costly.
Here are some recommendations proactive measures to share with your technicians.
Heed Warning Signs
Before taking the time to remove the u-joint to inspect for damage, there are telltale signs of u-joint problems you should pay attention to.
One of the earliest signs of u-joint damage is squeaking. It’s generally caused by metal-on-metal contact due to insufficient grease. You’ll likely only hear this sound when starting to move, as it will be drowned out by other noises once the vehicle is moving any faster than 5 mph.
Another common sign of u-joint problems is hearing a “clunk” with a ringing sound when moving the shifter between “Drive” and “Reverse.” This sound may be an indication of excessive clearance in the u-joints.
A third, and more serious symptom of u-joint damage is vehicle vibration when moving at higher speeds. This occurs when u-joint bearing wear has become severe enough to allow the driveshaft to move outside its normal rotational path.
Part of the reason this symptom is more serious is that it means the u-joint is now so worn that it may be causing damage to the transmission as well.
It’s important to be able to distinguish between vibration due to u-joint wear and vibration due to wheel imbalance. Vibration due to u-joint wear is typically a higher frequency since the driveshaft turns much faster than the wheels.
Also, wheel balance issues create a steady vibration, while vibration from a worn u-joint is felt during acceleration or deceleration.
Inspection Time
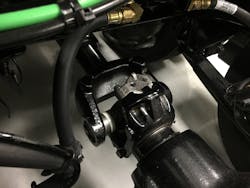
Now that you suspect developing u-joint problems, it’s time to inspect the component. You’ll need to start by removing the driveshaft from the truck.
Before removing the driveshaft, it is imperative to draw alignment marks on the driveshaft flange and the differential pinion flange. You’ll need to align these marks when you reinstall the driveshaft to make sure you’re spinning the driveshaft in the same position.
Once you have the driveshaft removed, inspect the u-joint. Hold the driveshaft in one hand and the flange yoke in the other. Spin the flange yoke lock to lock in both directions. If you feel any type of binding or looseness, the u-joint needs to be replaced.
Removal
Start by removing the four retaining clips that hold the u-joint in place. Once the retaining clips have been removed, SKF recommends using a ball-joint/u-joint press set or shop press for best results when removing the u-joint from the yoke flange.
Use an impact gun or shop press to remove the first u-joint cap. Then flip the driveshaft so that you can press the cross outward to remove the other cap.
Once you have the u-joint off, it’s important to clean up the surfaces of the flange yoke. This includes the grooves that hold the retaining clips and the areas inside the flange yoke where the caps ride.
Replacement
Begin by removing all of the u-joint caps, taking care not to lose any of the needle bearings.
Set the u-joint into the flange yoke and replace one of the caps you removed. Always be careful not to lose any of the needle bearings in the caps.
At this point, it’s a good idea to install the retaining clip on the end opposite to the one you’ll be driving in with the press tool. This way it will stop where it’s supposed to.
Replace the other cap and press the u-joint into the yoke flange. Use a ratchet or shop press – not the impact gun – for finer adjustments. Once you have the u-joint in place, flip it around to replace the clip on the opposite end.
Now that you have the u-joint set into the flange yoke, place the other ends of the u-joint through the driveshaft “ears.” Replace the caps, press them into place and reinstall the outside clips.
Driveshaft Reinstallation
Before reinstalling the driveshaft back onto the truck, you’ll want to make sure that the u-joint is not binding or too loose. Some newly installed u-joints can be a little tight. If this is the case, simply tap the yoke flange ears with a hammer to free up the u-joint movement.
Now, slide the driveshaft back into the transmission, then mount the driveshaft to the differential pinion flange. Make sure to align the marks you made before removing it.
When reinstalling the driveshaft bolts, be sure to apply thread locker and torque them down to the manufacturer’s specifications.
If the u-joint is greaseable, insert a small amount of grease as a final step.
After all this has been done, you’re now ready to test drive the vehicle to make sure there are no unwanted noises or driveline vibrations.
Pete Kaftantzis is an ASE (National Institute for Automotive Service Excellence) Master Certified Technician with SKF (www.skf.com), a leading global supplier of bearings, seals, mechatronics, lubrication systems and services which include technical support, maintenance and reliability services, engineering consulting and training. He has 24 years of auto and diesel repair experience.